
![This is my Lyman M die. I love this die. It expands the case mouth and inside sizes the neck after I undersize the neck with a neck sizer with […]](https://theurbanrifleman.com/wp-content/uploads/2013/08/CAM00789-620x300.jpg "Modifying the Lyman M die for .223")
This is my Lyman M die.
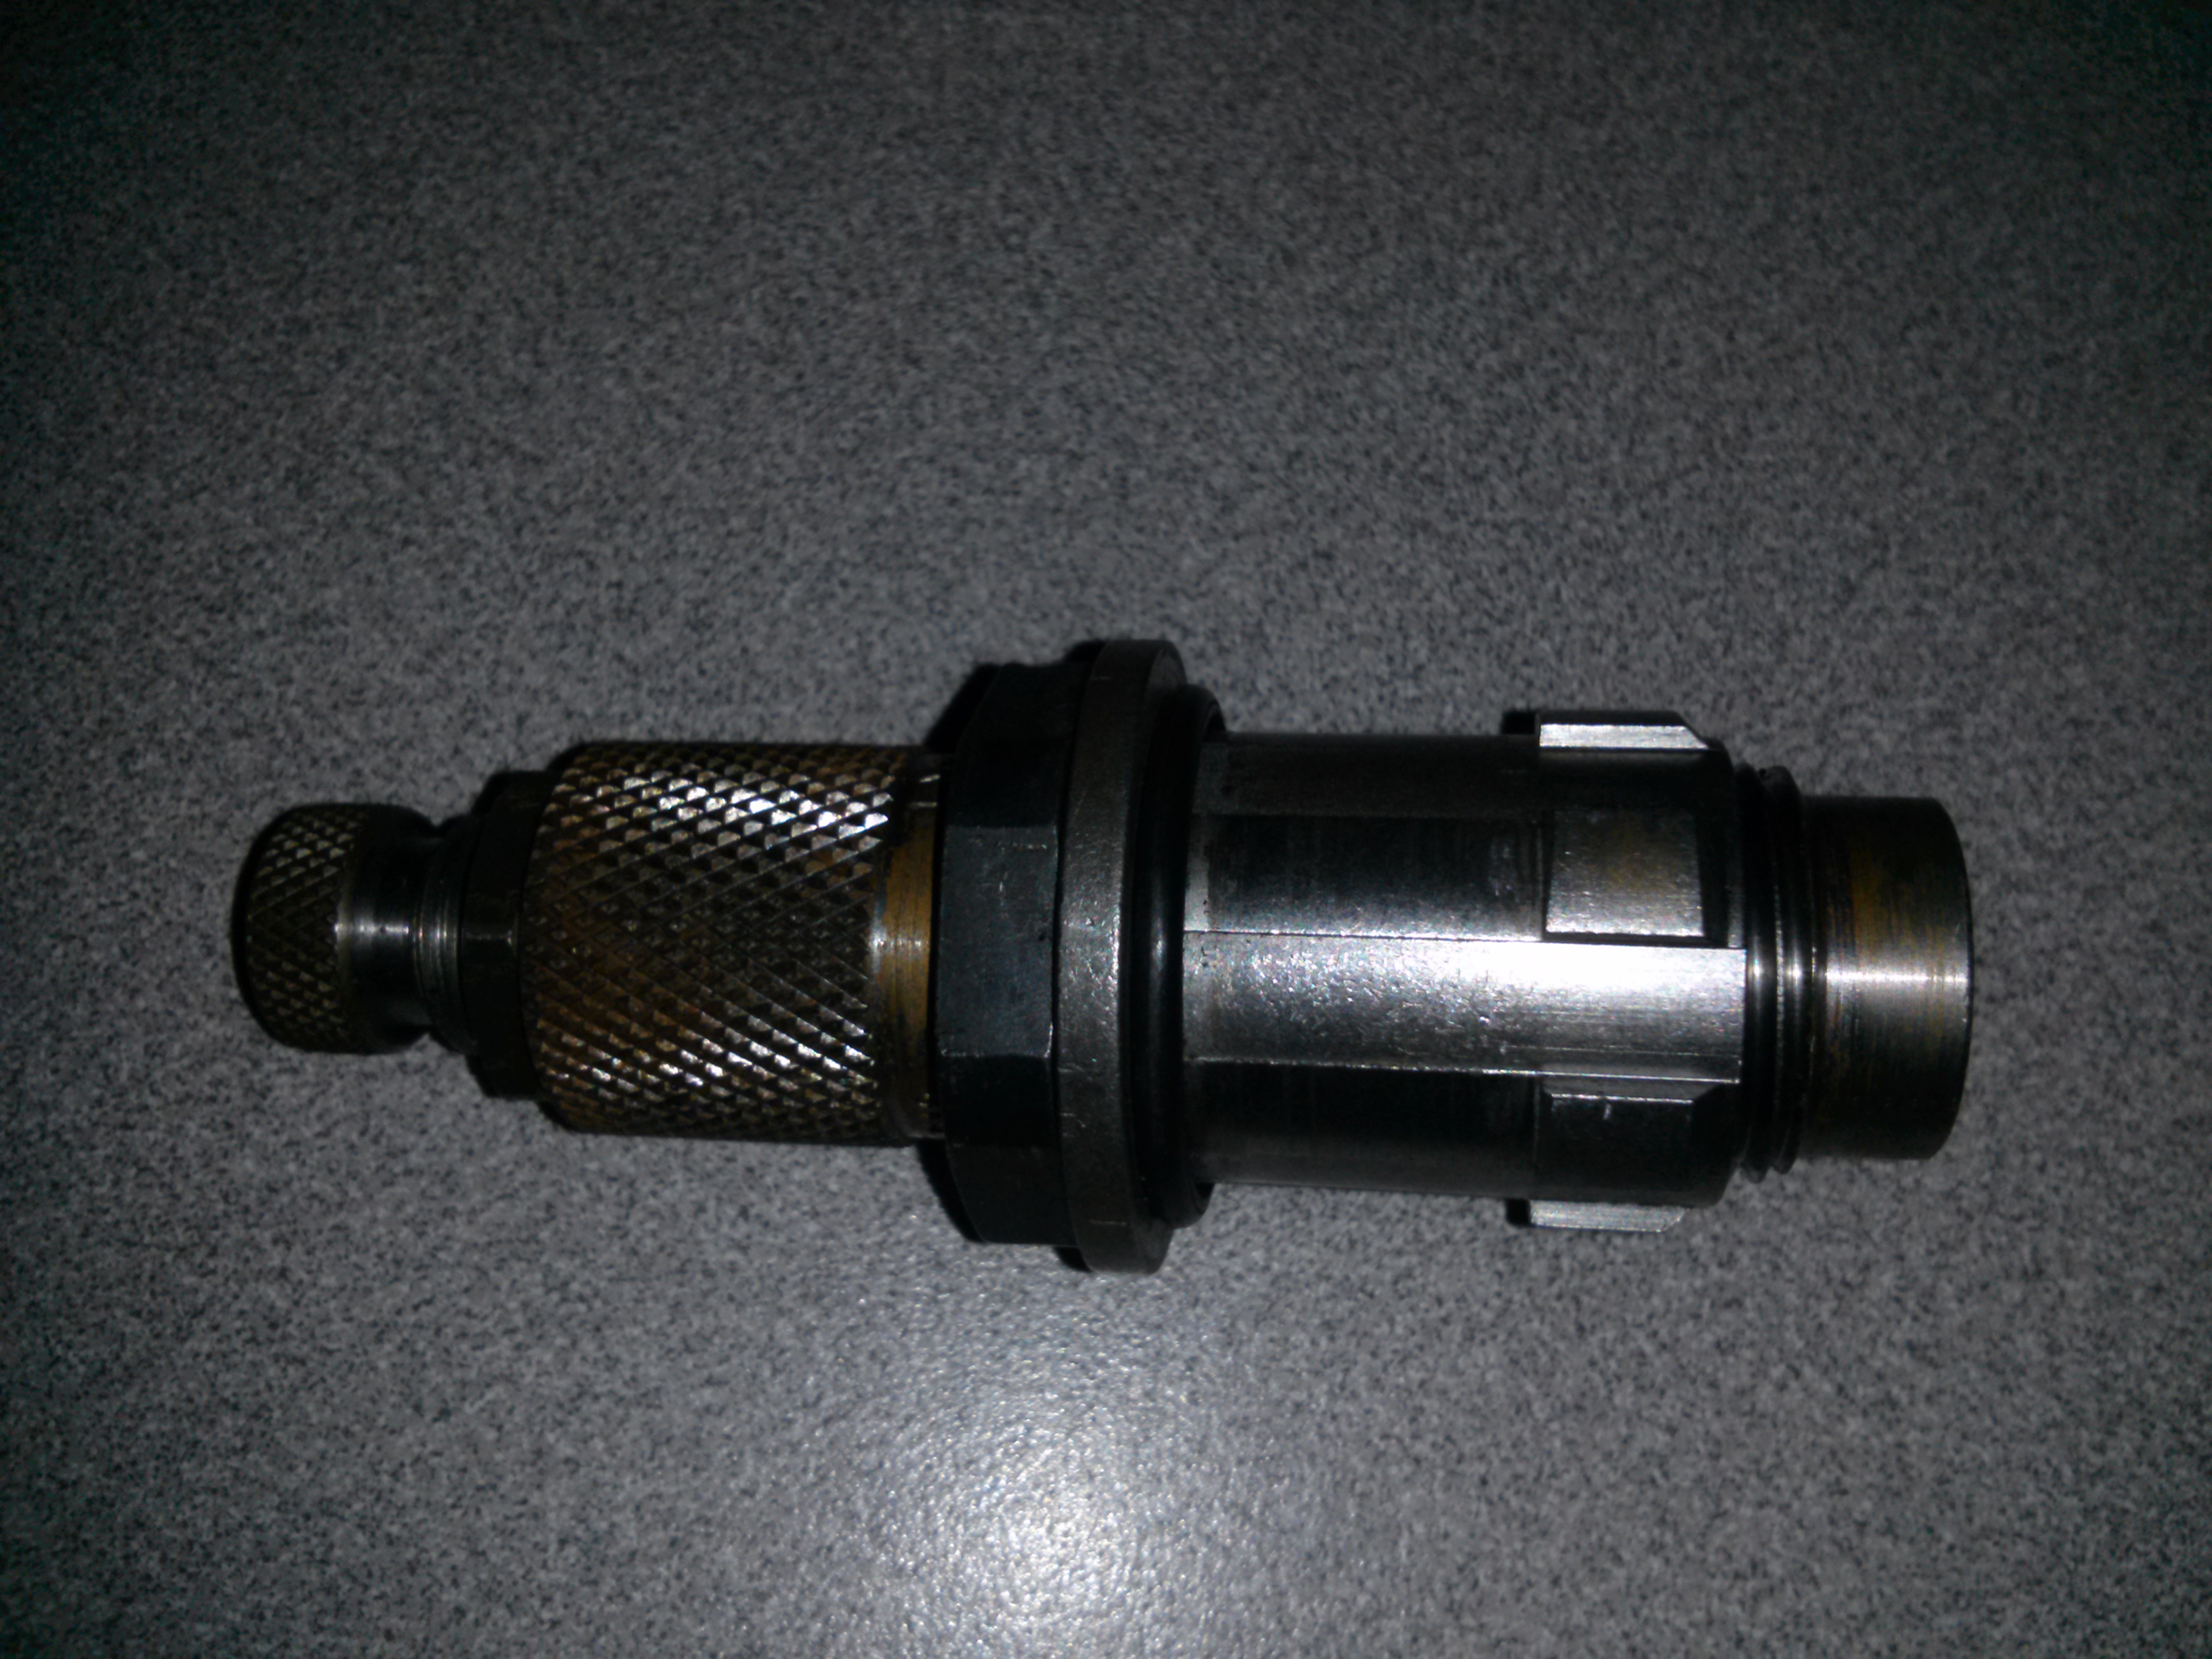
I love this die. It expands the case mouth and inside sizes the neck after I undersize the neck with a neck sizer with no expander ball. Really irons out the neck nicely and makes he prettiest flare at the top that flat back bullets just sit on the case. The problem is that it is a universal die, and is not self centering for 223 (I use it for 223 on my progressive). If the case does not align perfectly on the expander WHAM!!! Bunged neck opening!!!
The ID is .577″ and the OD of .223 is .375″. So I super glued in a series of O-rings that I glued to together over a bolt. Now it works kind of like a spark plug socket!!! Self aligning!!! No more dinged necks!!!
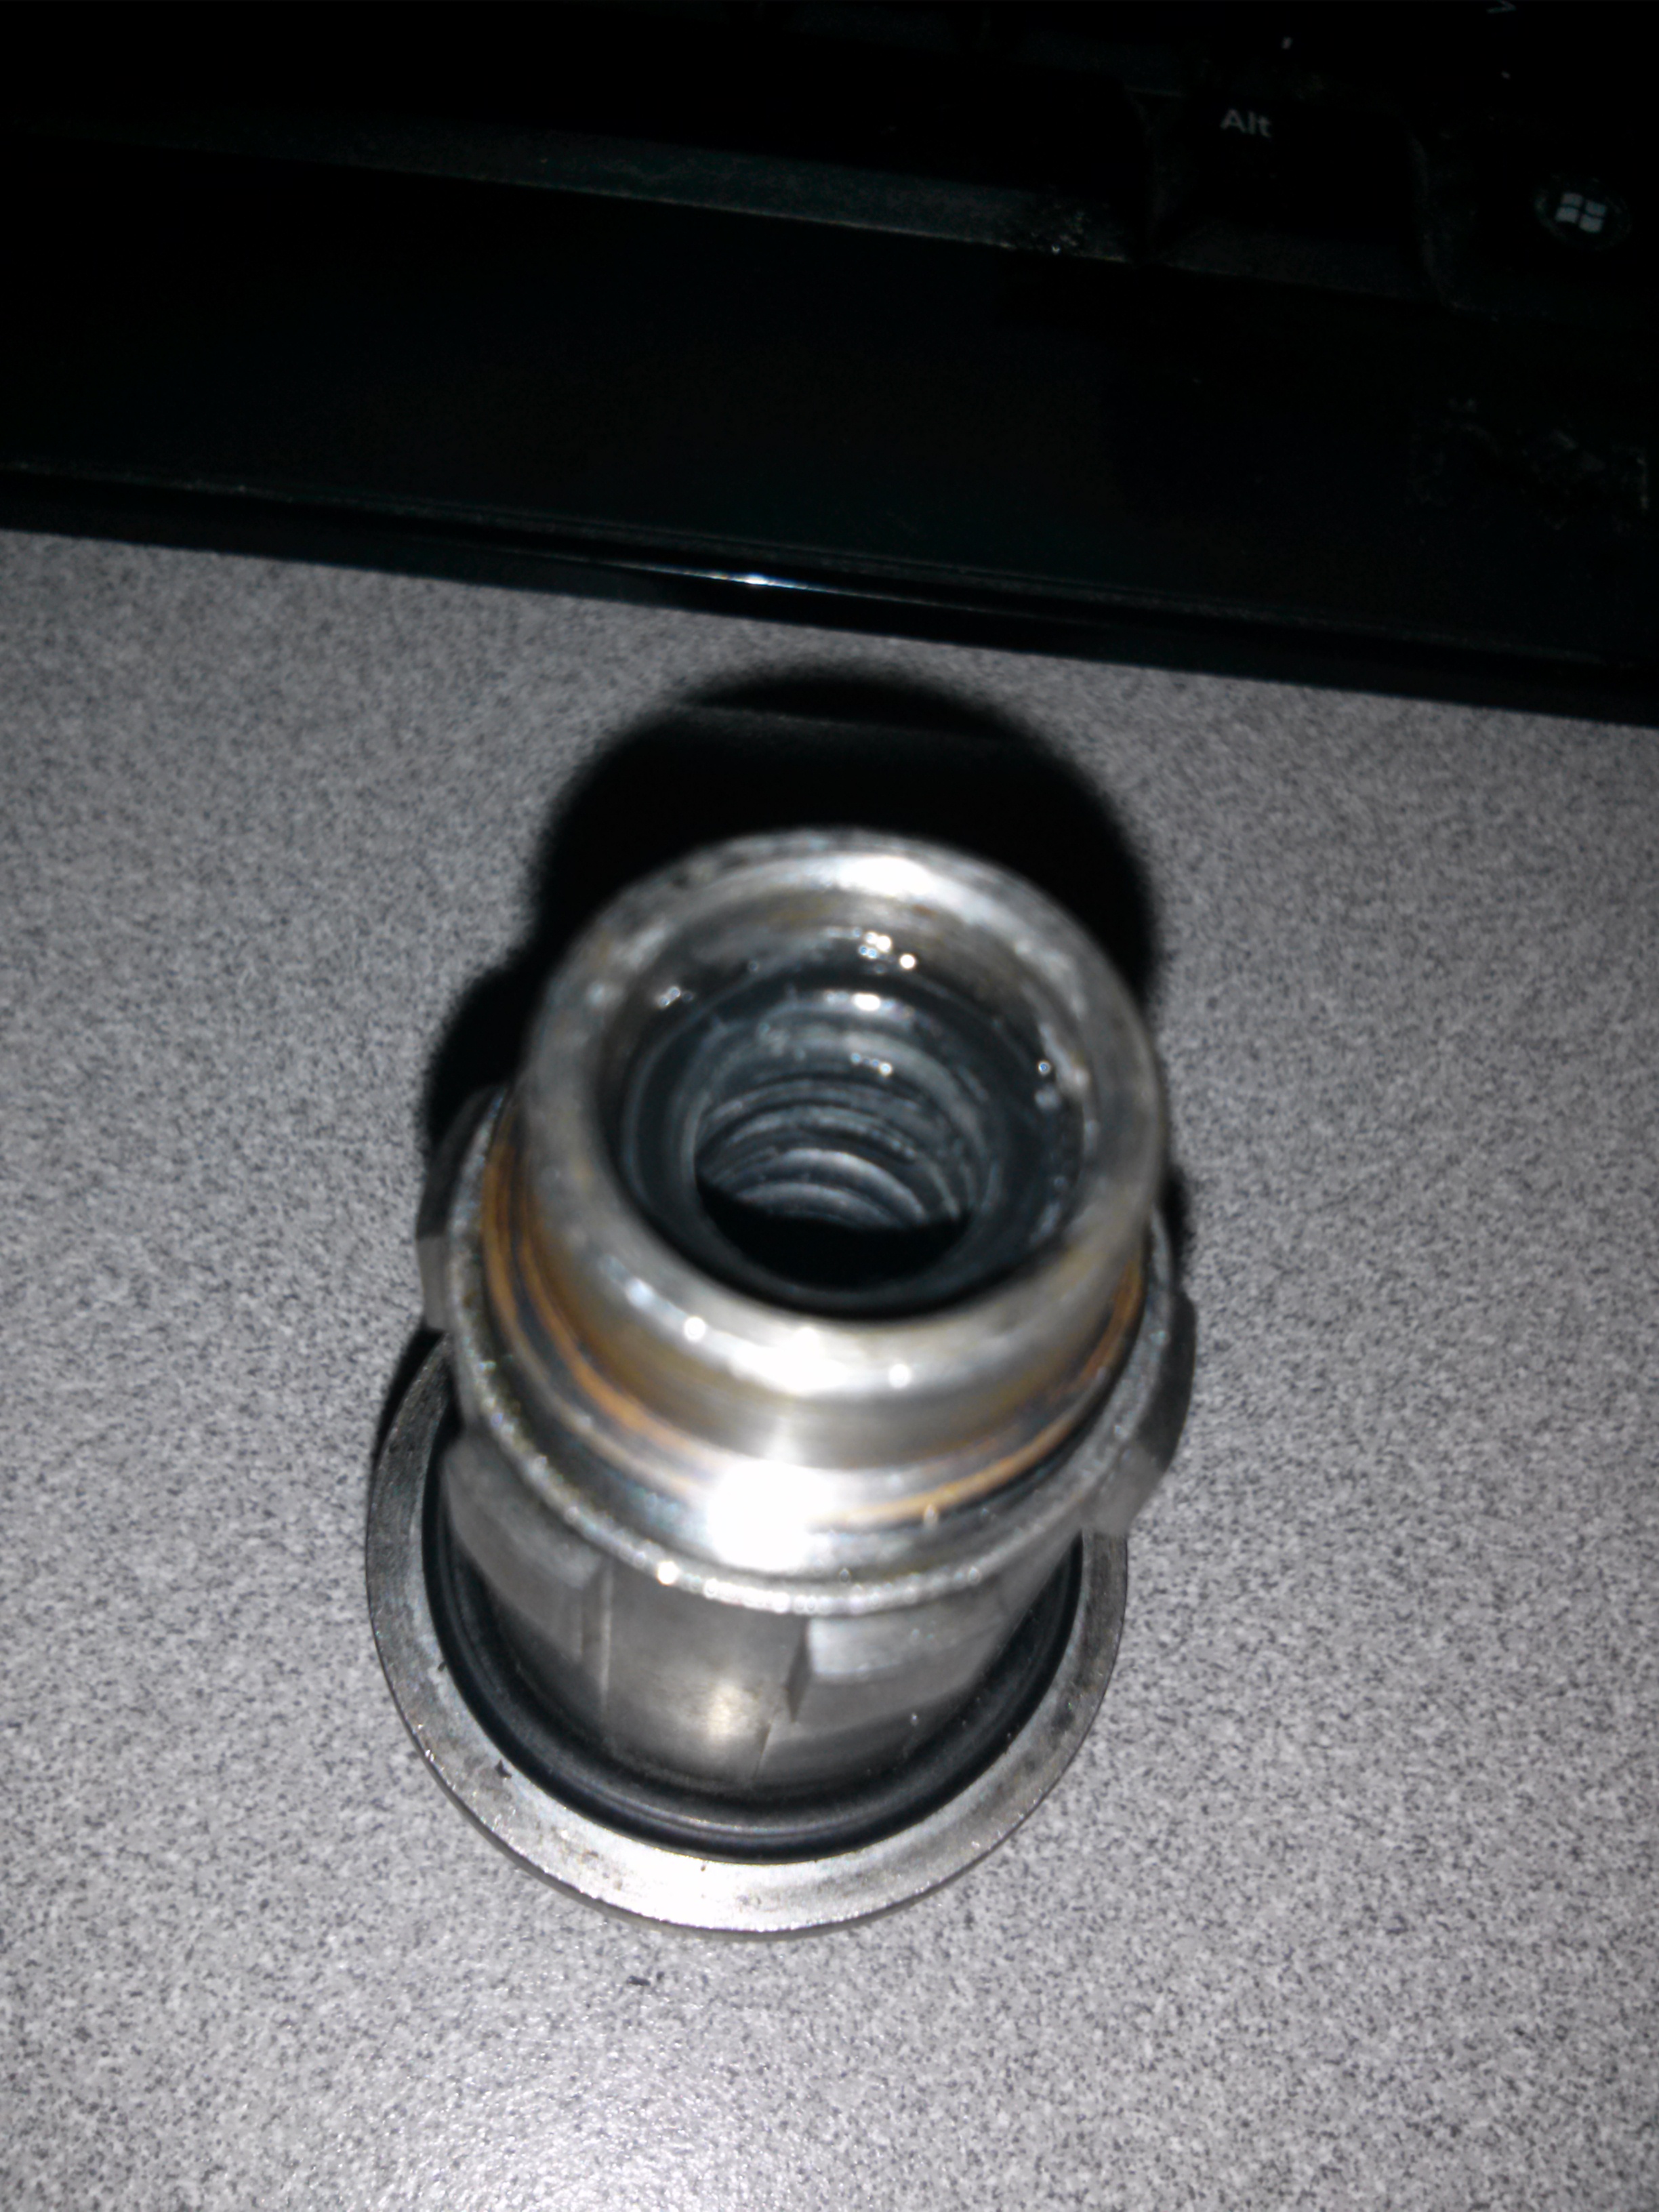
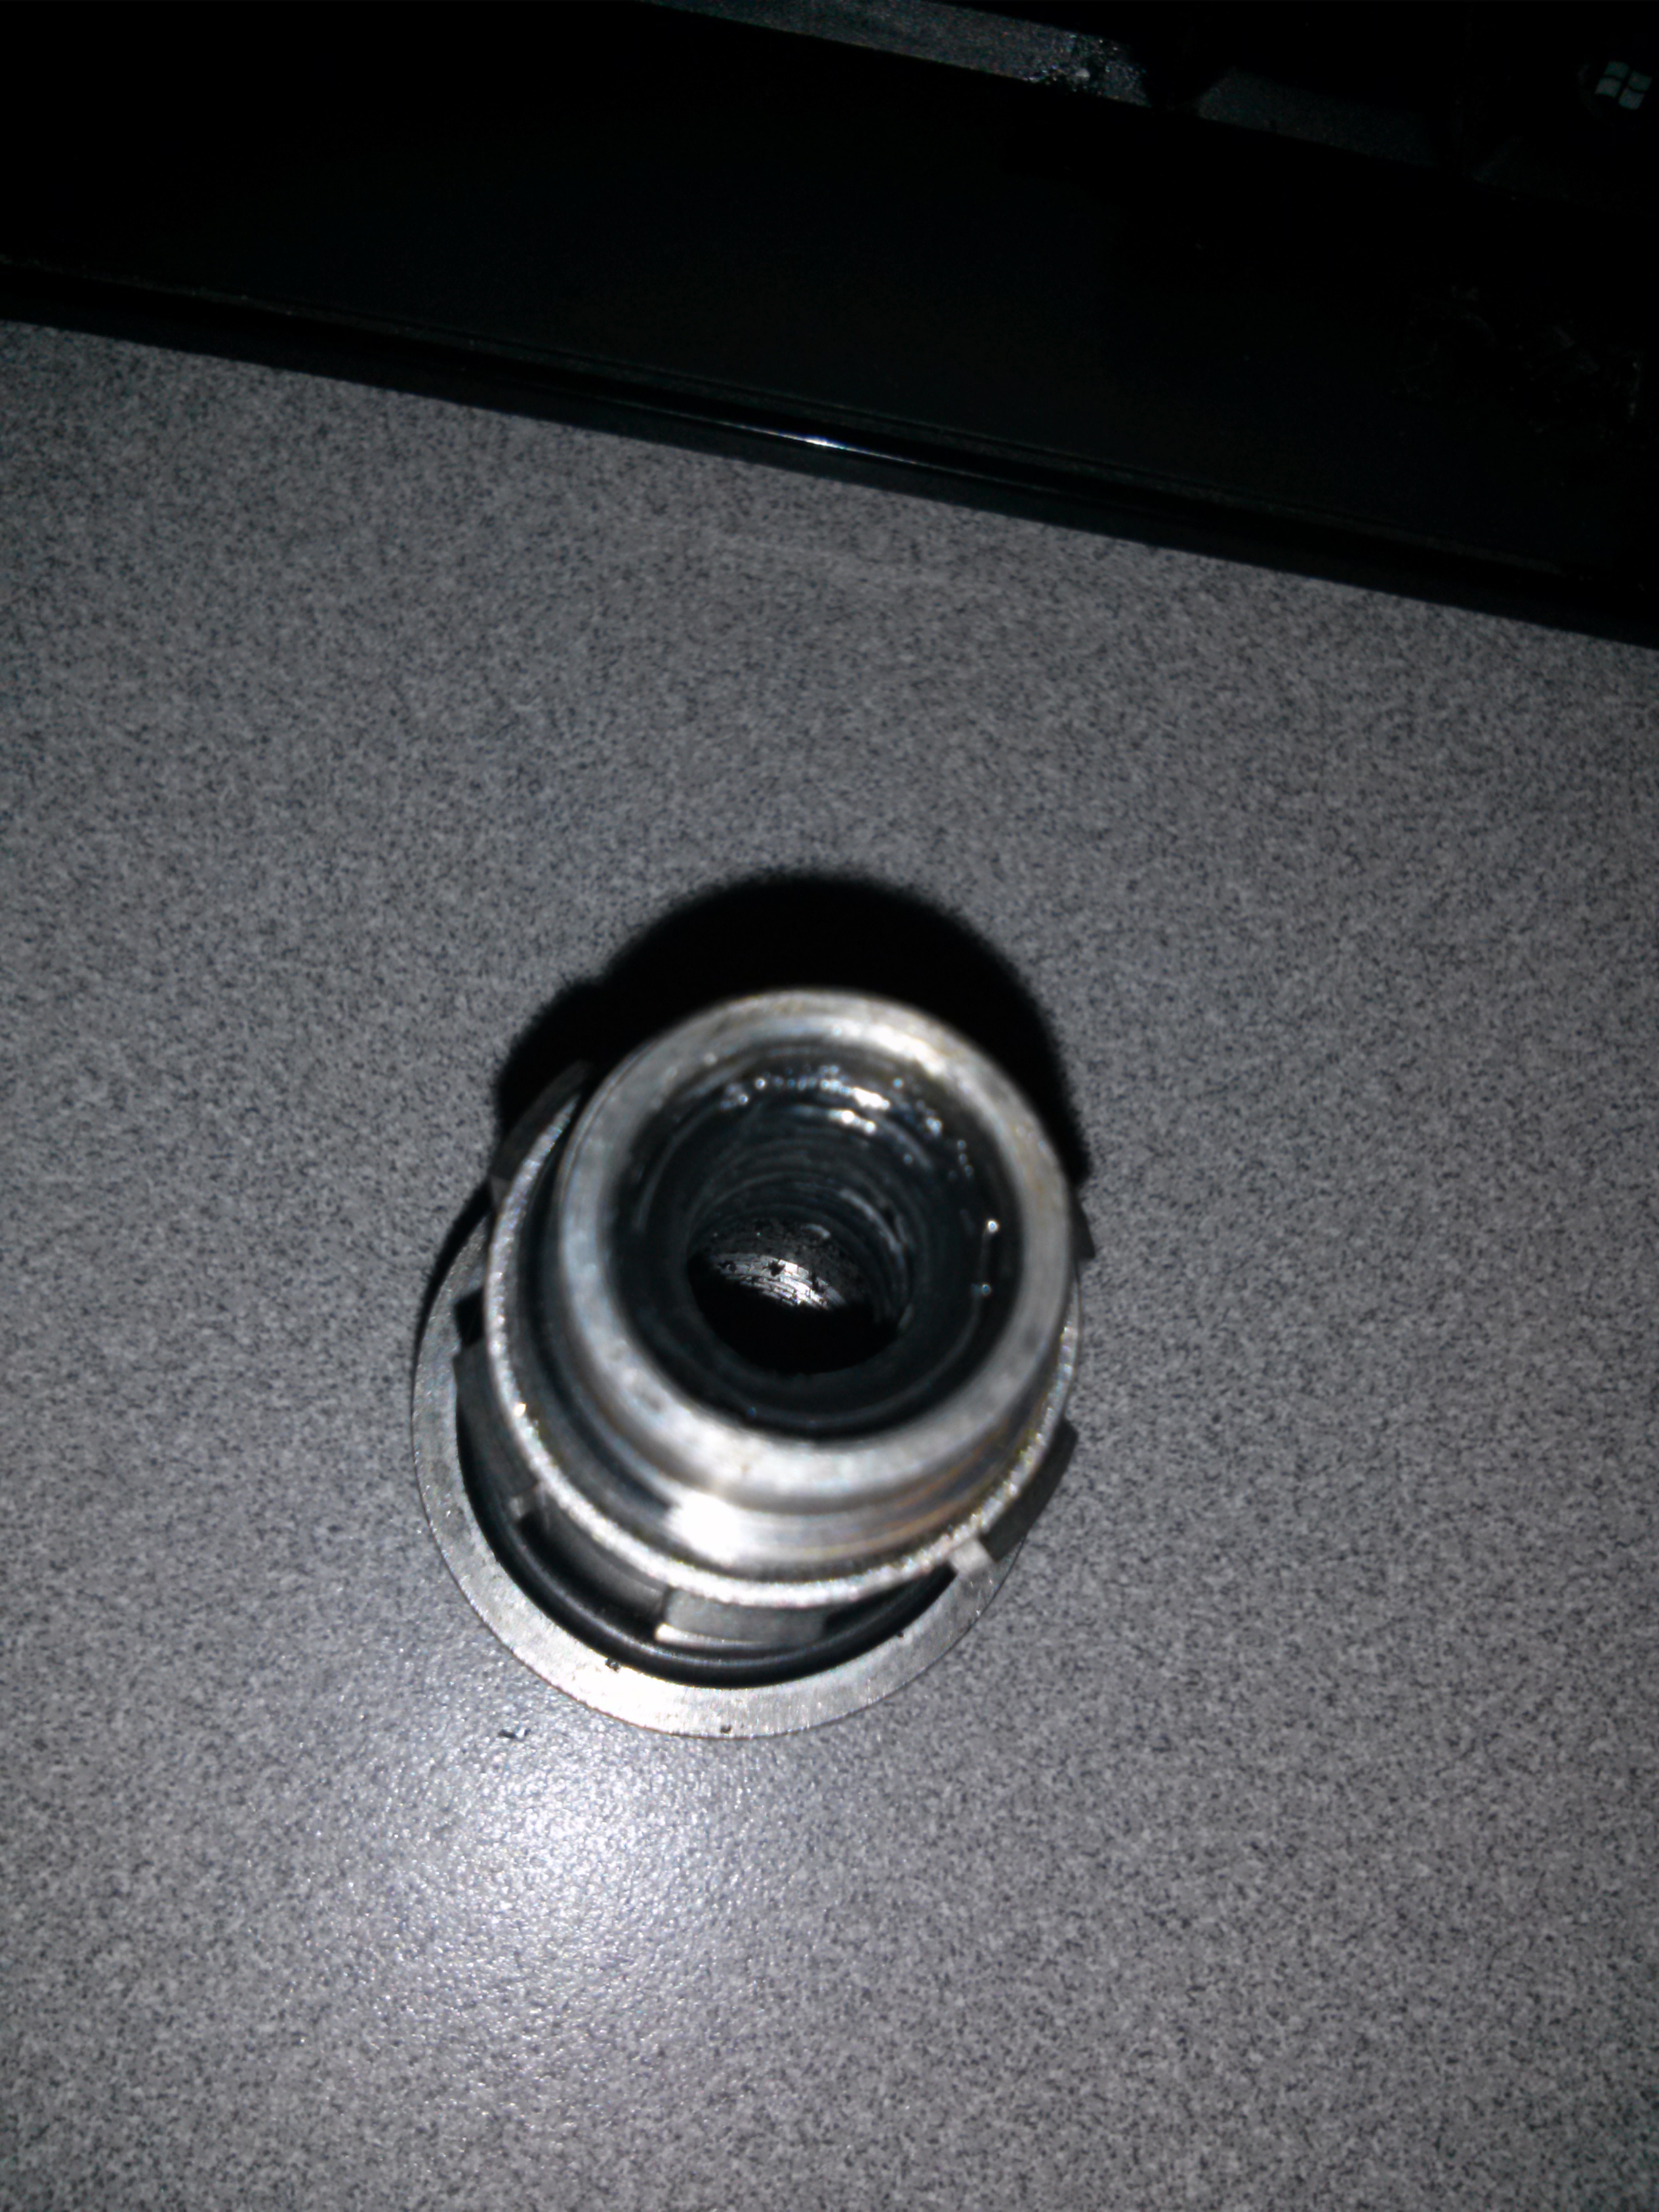
Note the stack of O-rings. I used thin super glue to secure them to each other and then to the die. Worked very well. Super glue works very well on Buna O-rings.
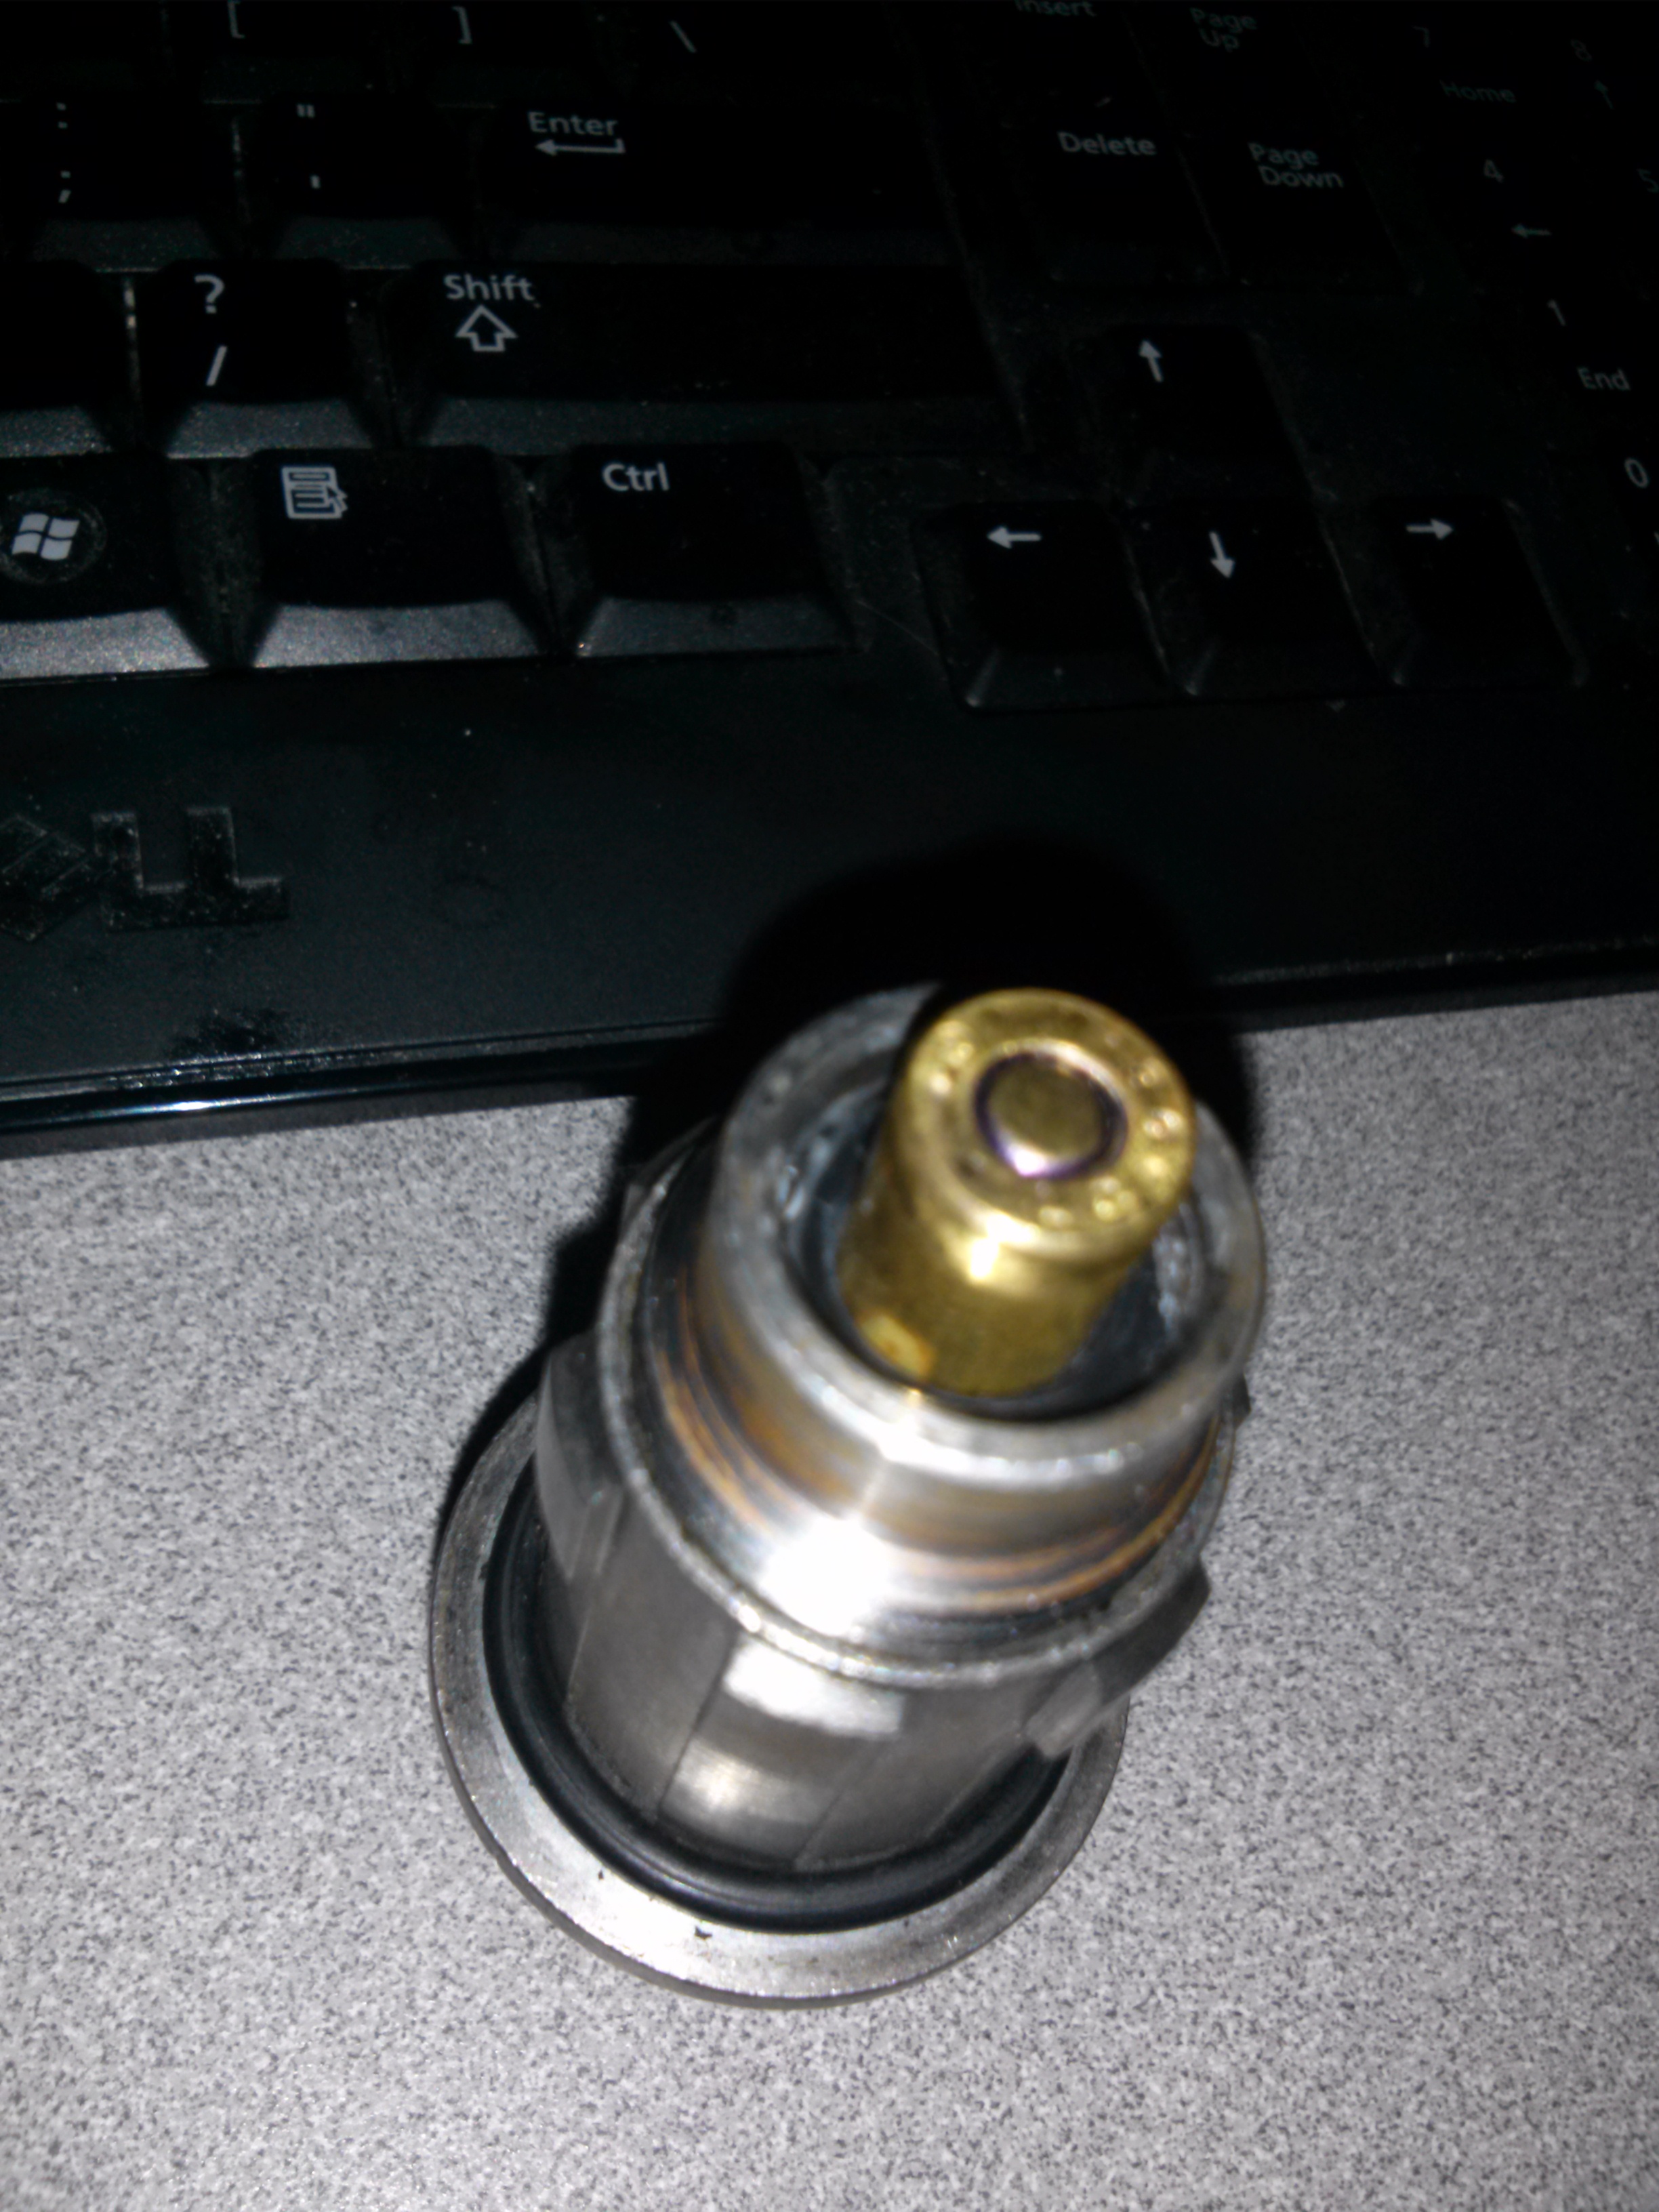
Here is the die with the case inserted. You can see now, the case is self aligning!!! Finally!! I have ruined a lot of cases with this die (but I use them for 300 Blackout so I don’t get in a twist).
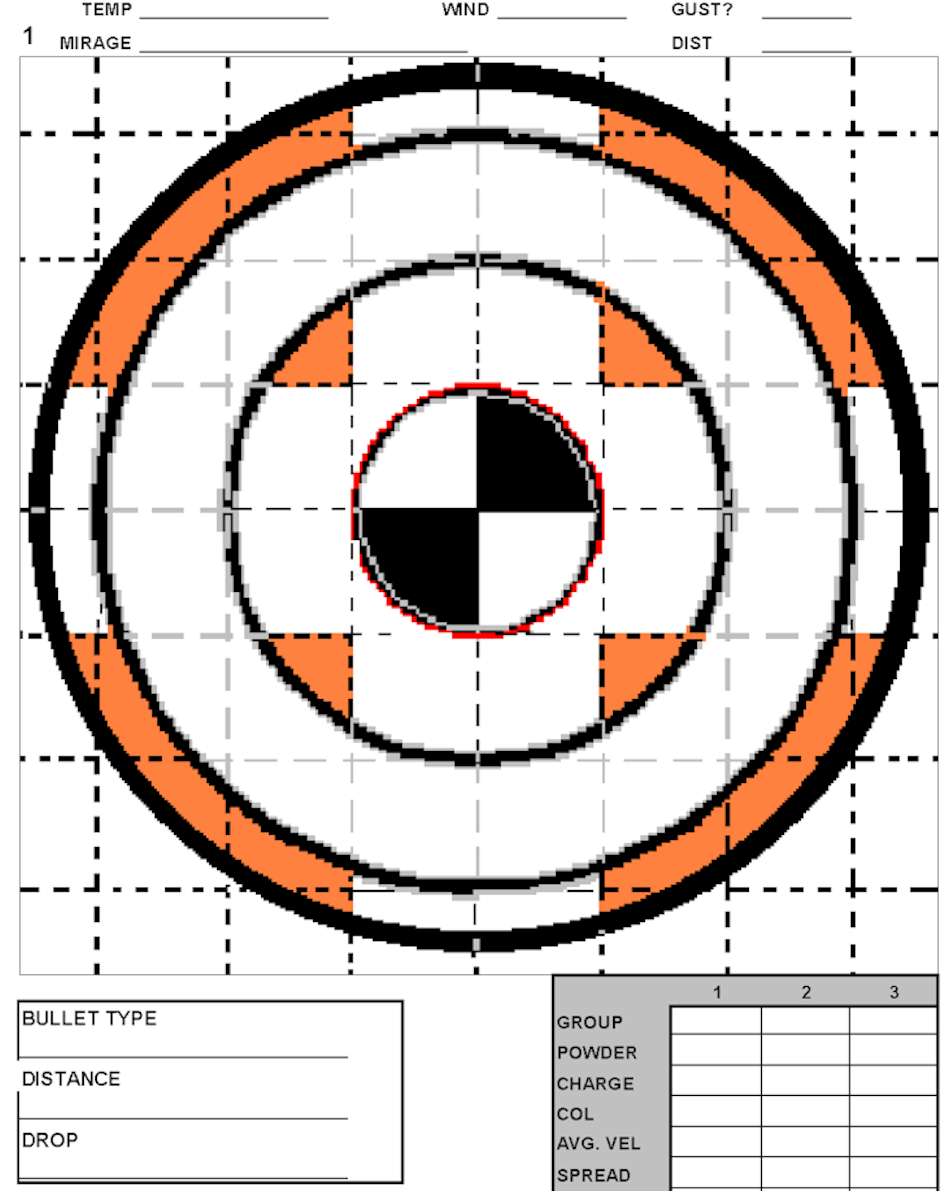
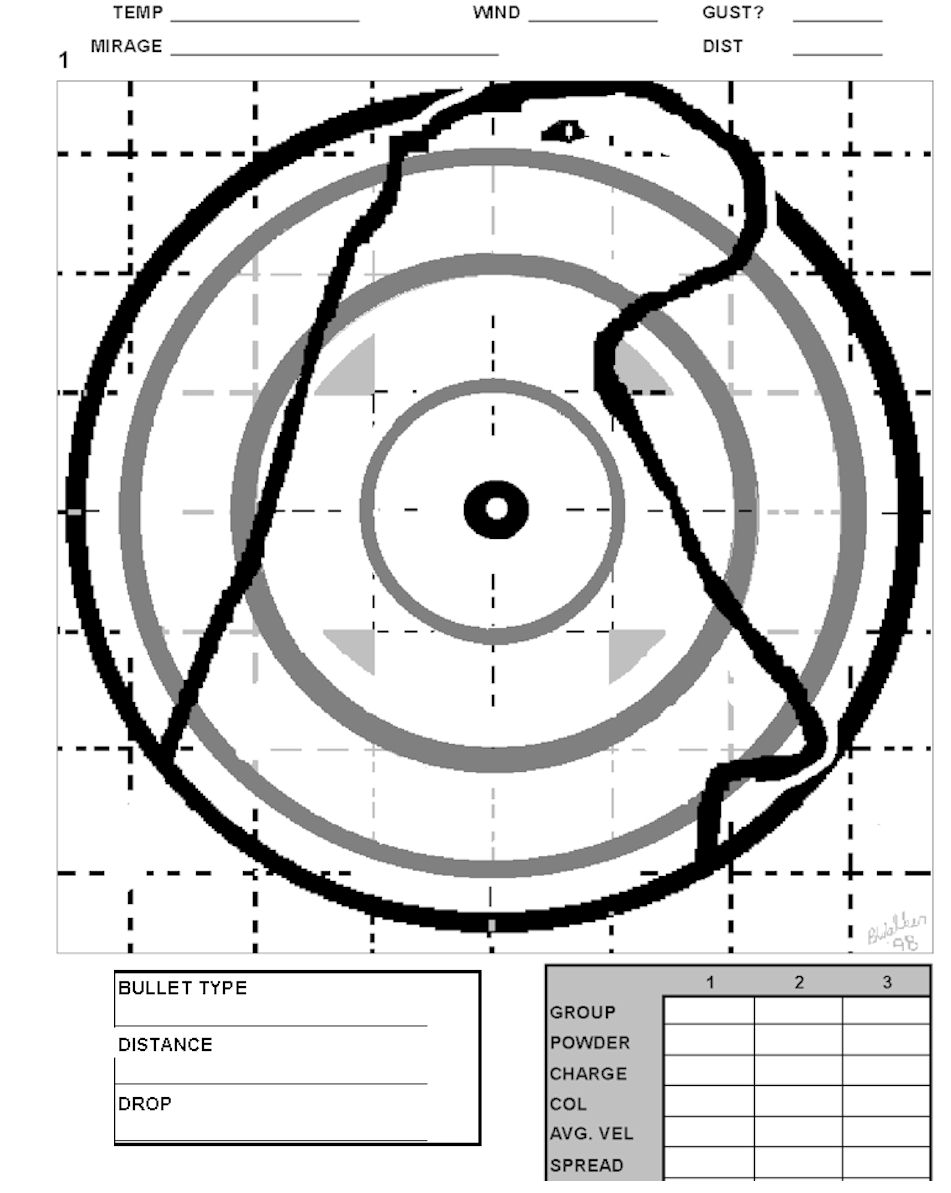
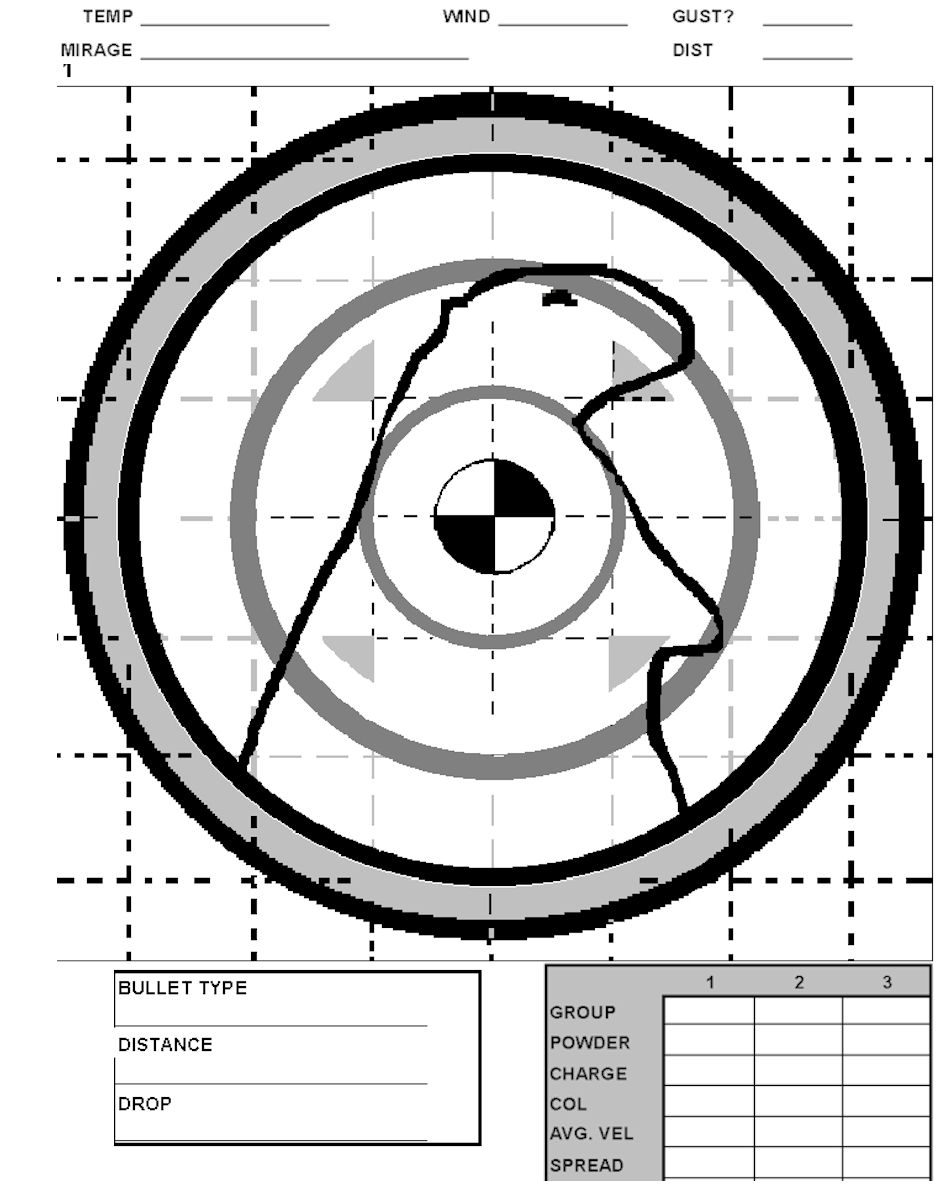
![What I have tried to do here is offer my fellow precision shooters a set of targets that can be printed directly from the browser. These targets are formatted in […]](https://theurbanrifleman.com/wp-content/uploads/2013/08/100-yard_standard_target-620x300.jpg "Free Target Download from the Urbanrifleman")


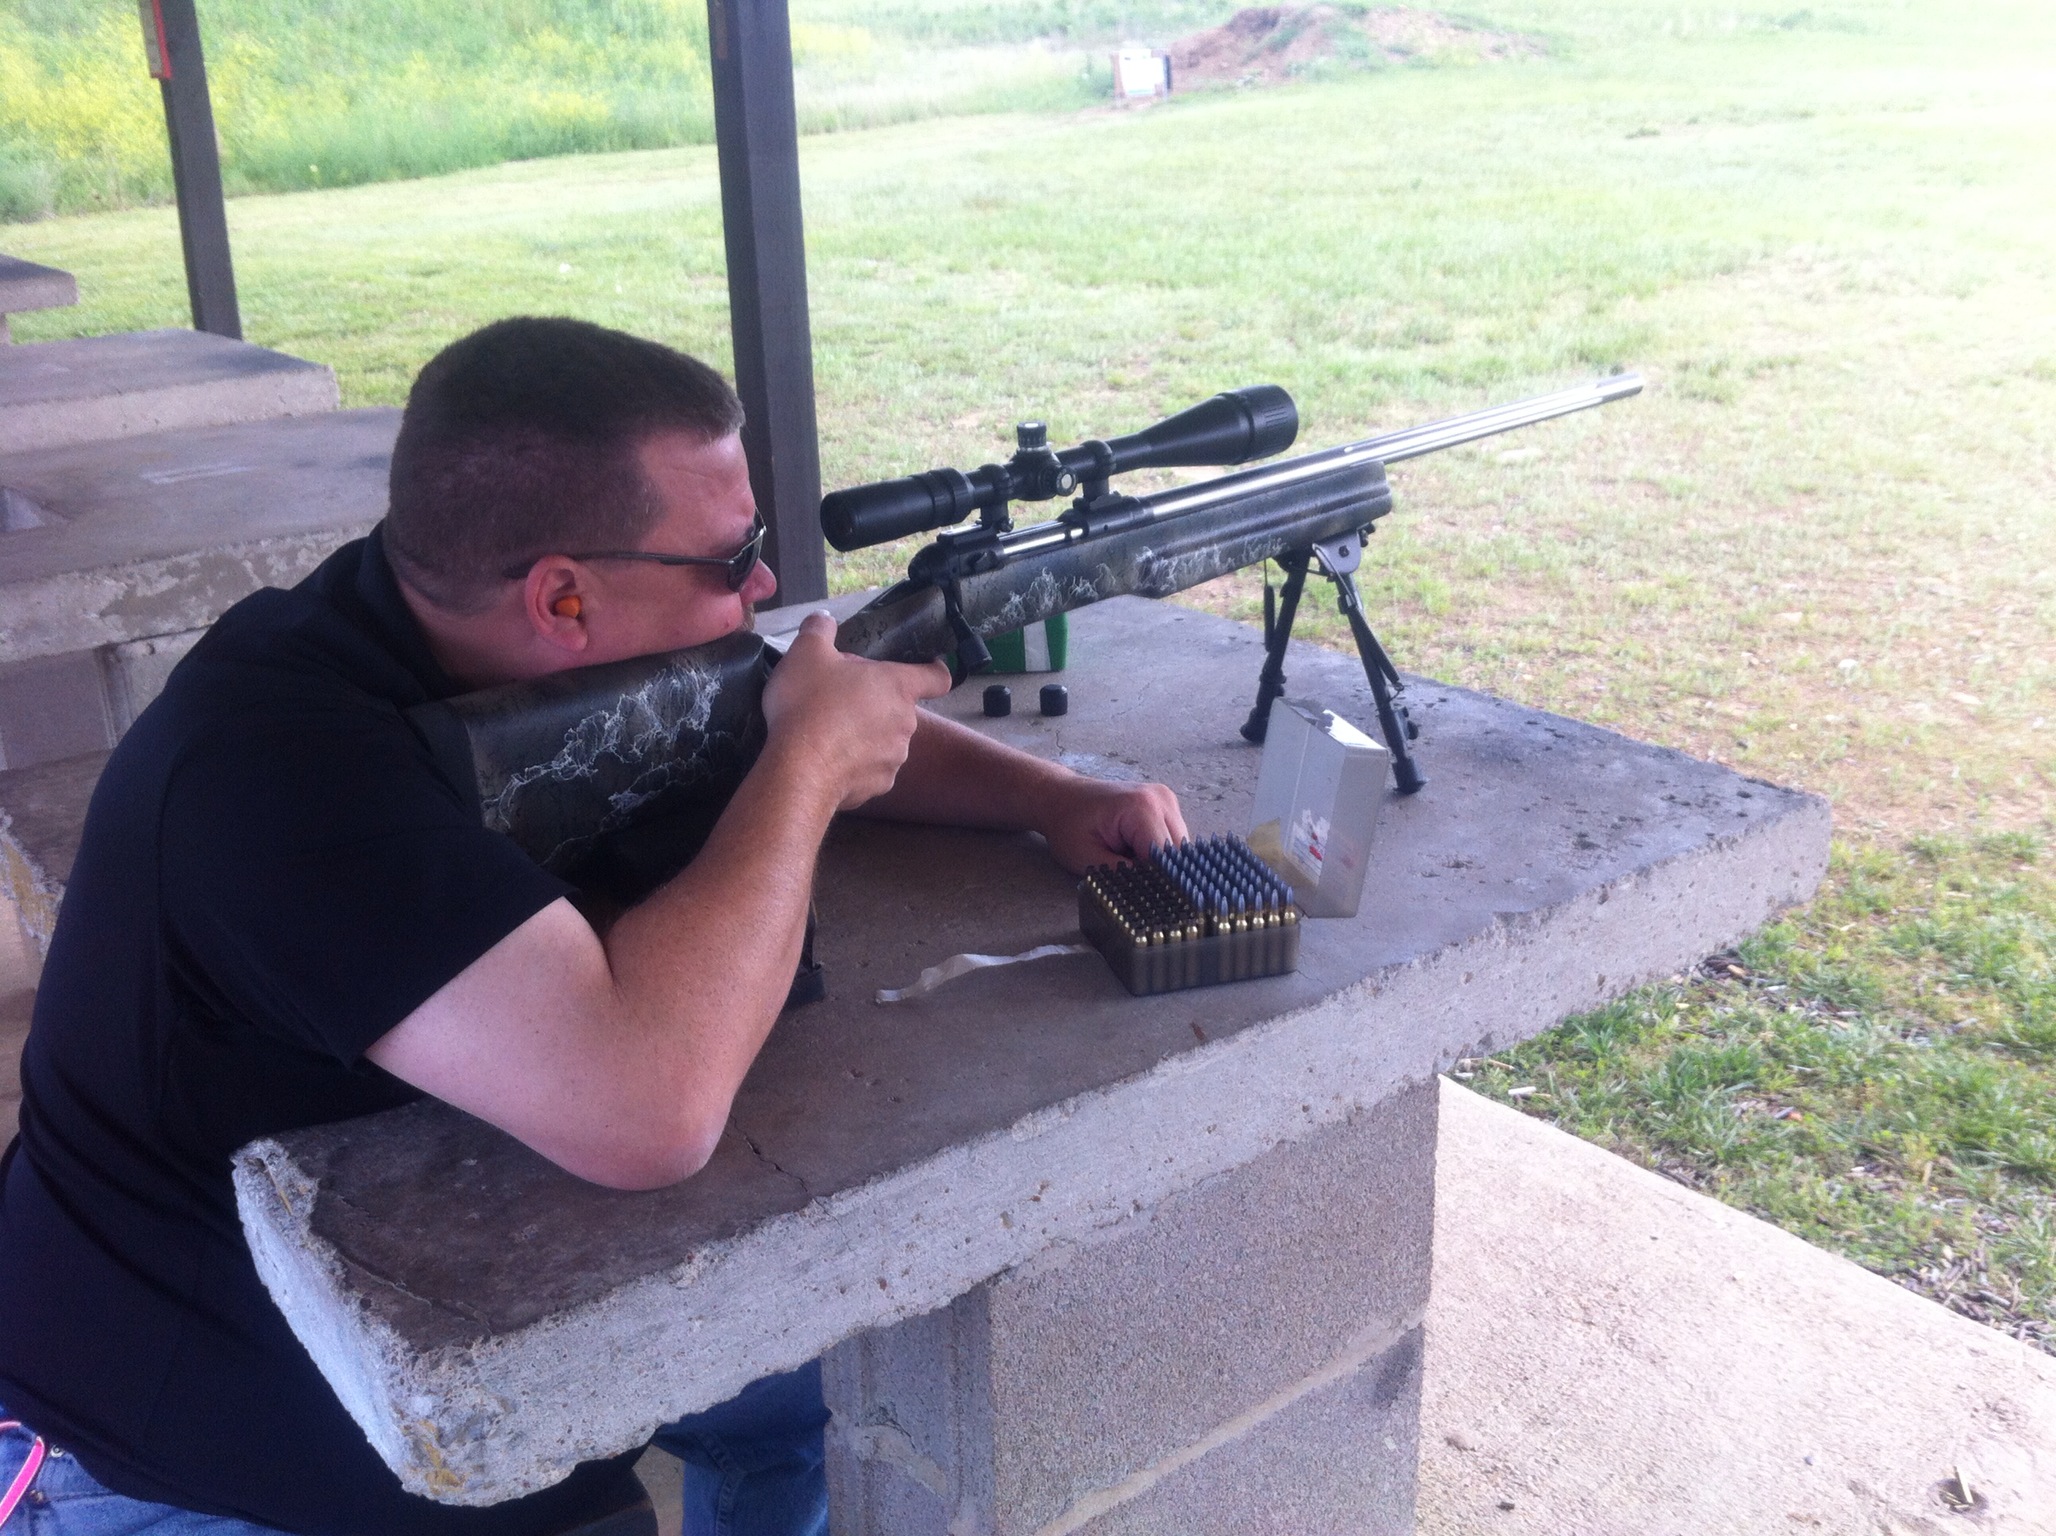
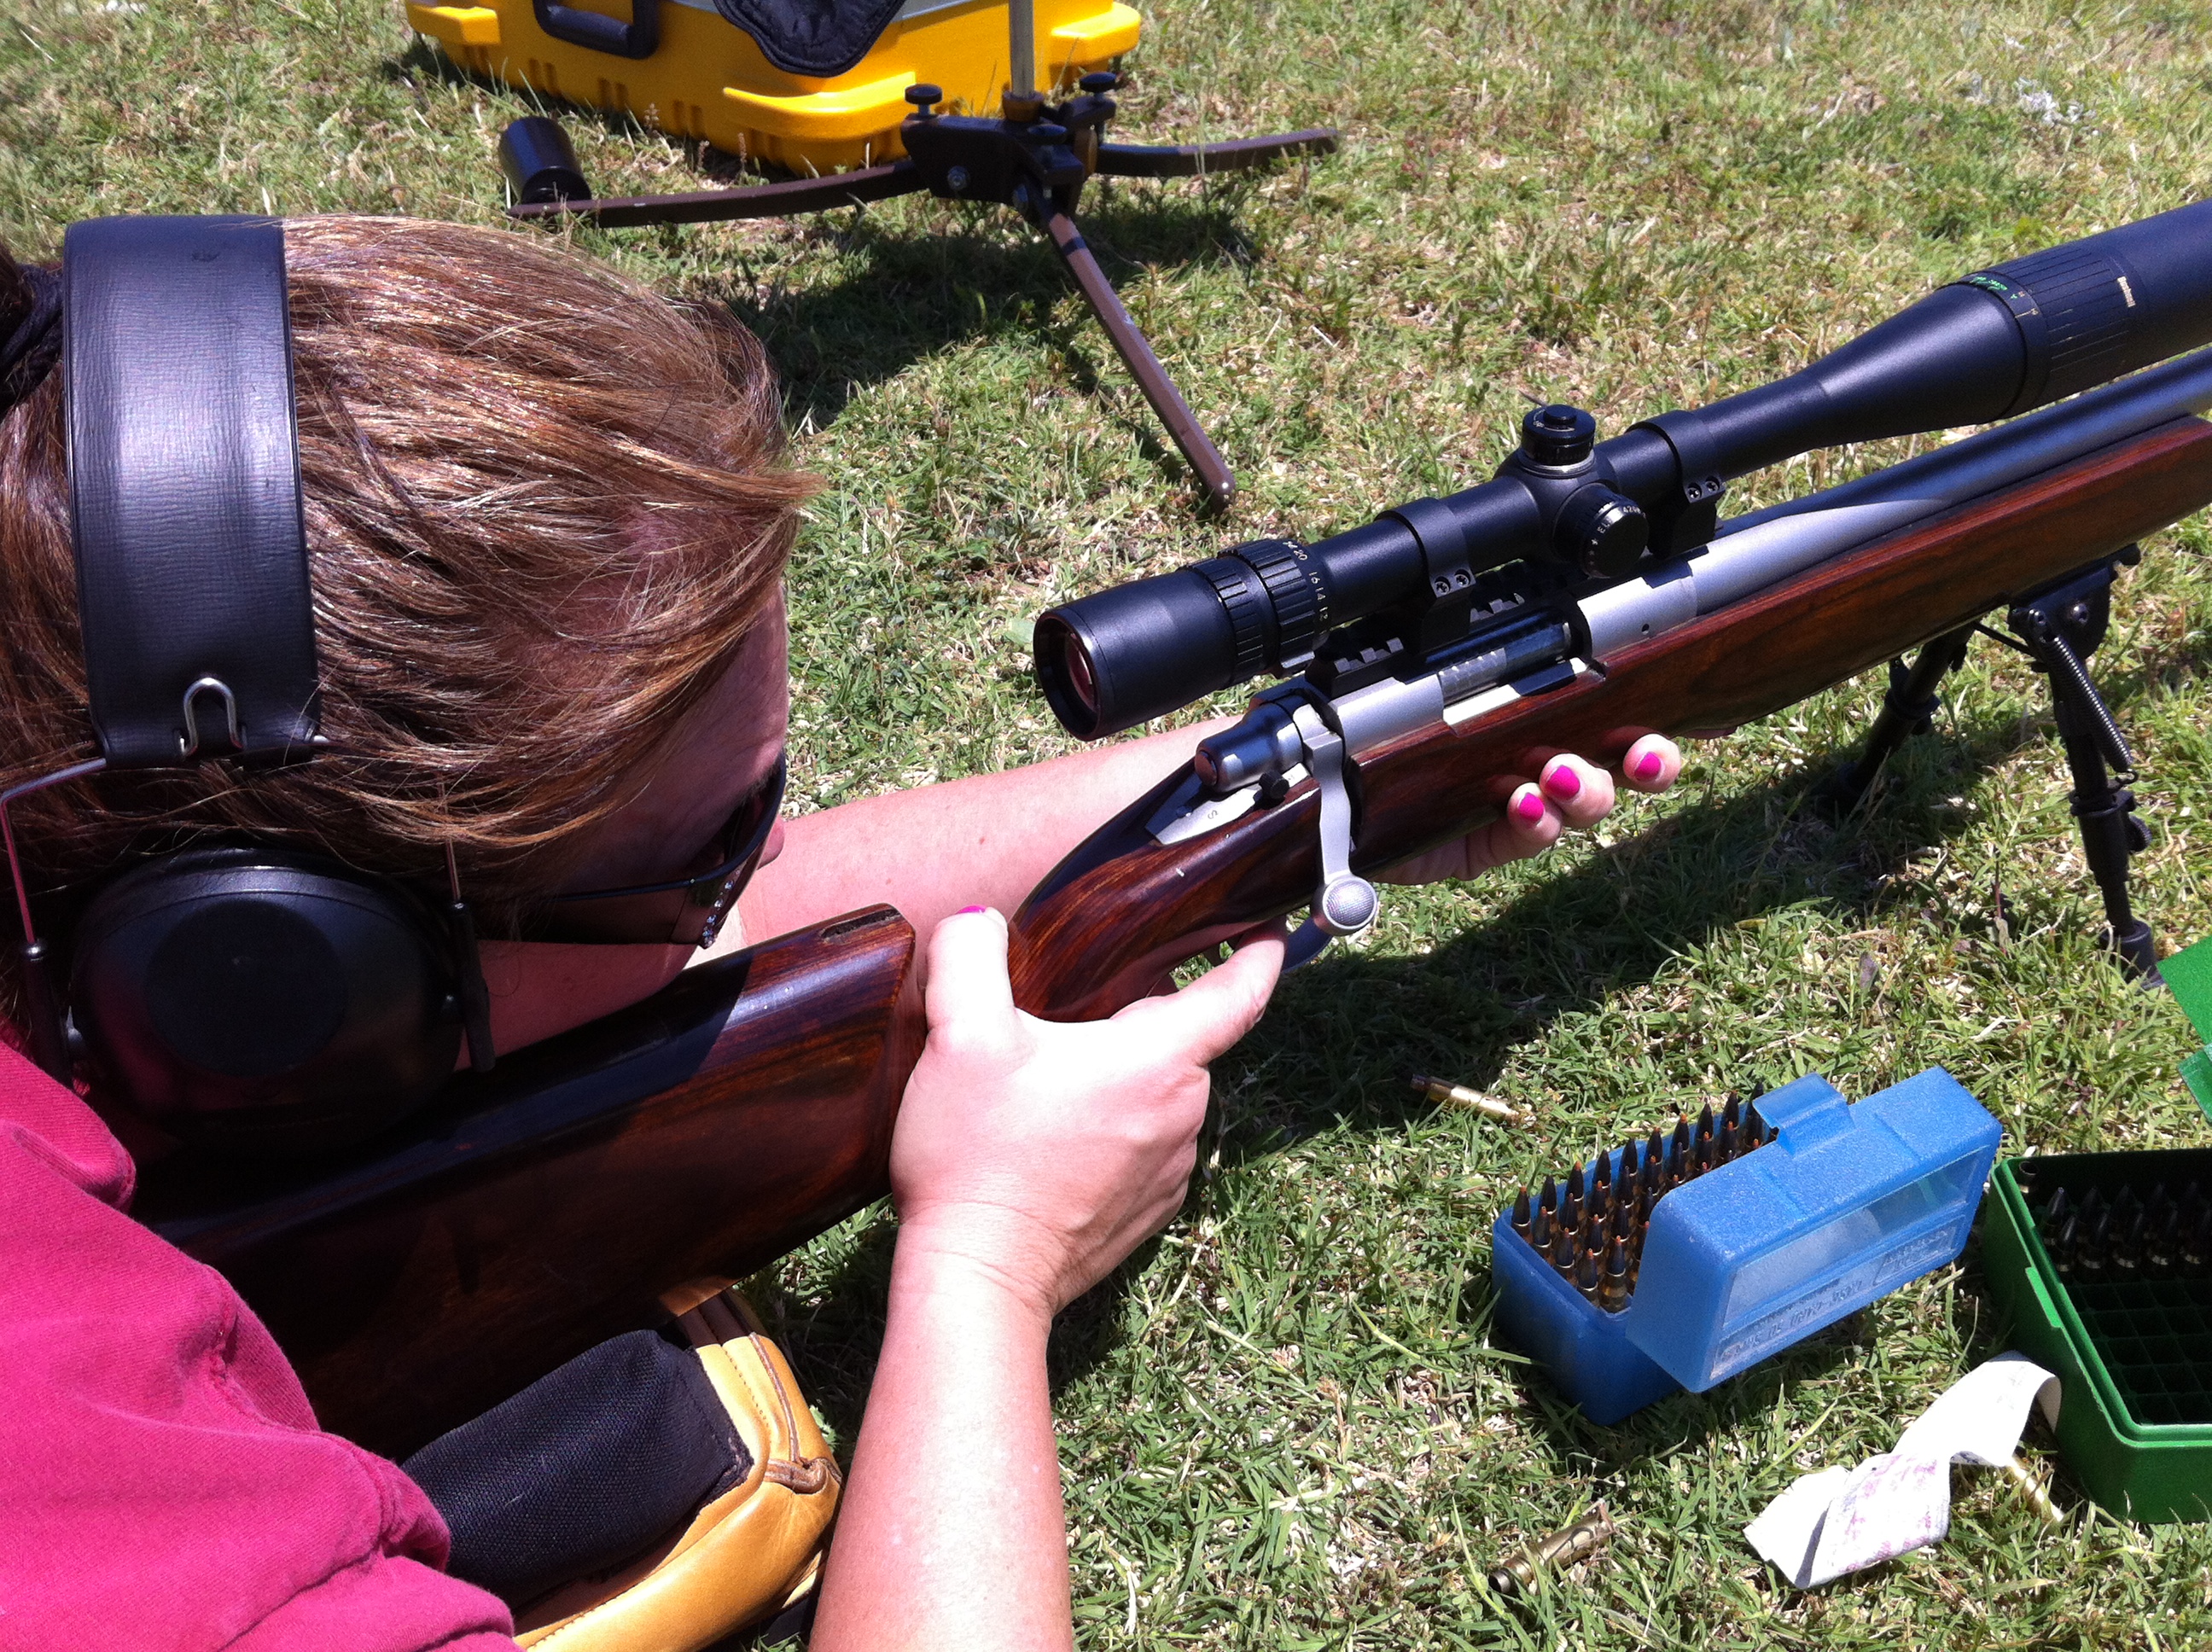
![I have literally been loading .223 for twenty years. It is the most forgiving cartridges I have worked with in my entire career of reloading. It really is not hard […]](https://theurbanrifleman.com/wp-content/uploads/2013/04/IMG_1087-620x300.jpg ".223 Accuracy Loads for Light Bullets")
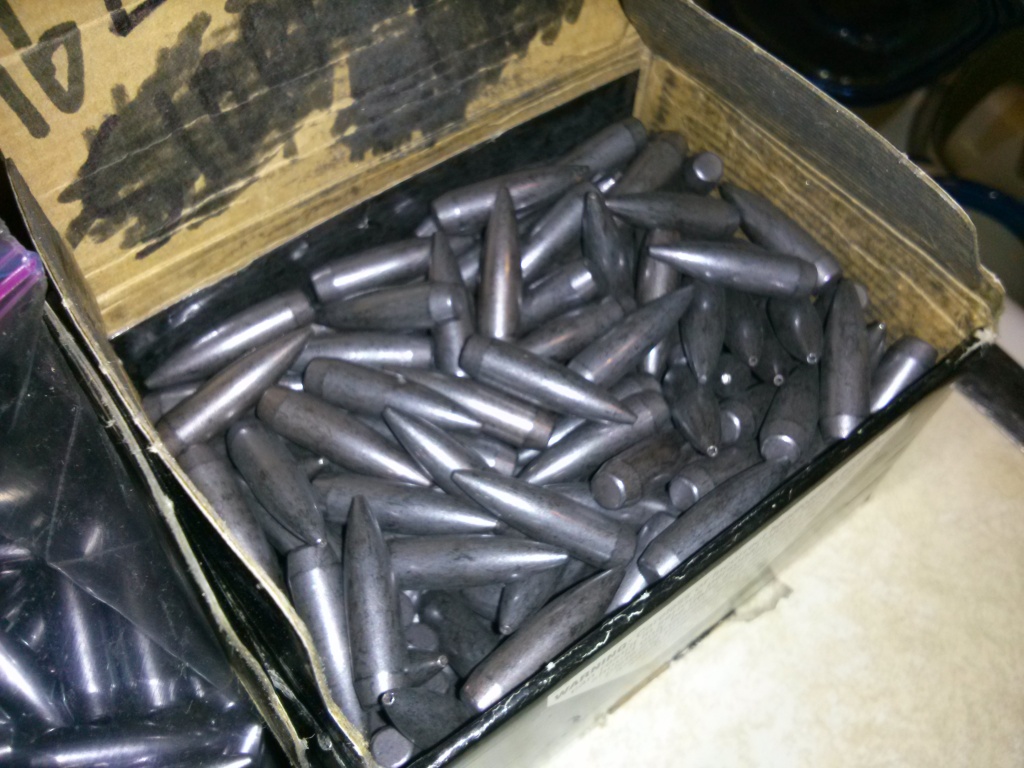
![I have been collecting the loads for long range .223 here are some: 77 SMK (COL of 2.25): 24.5 R15 23.3 8208 23.5 Varget 21.7 H322 22.5 IMR 4895 24.5 […]](https://theurbanrifleman.com/wp-content/uploads/2013/04/IMG_1201-620x300.jpg ".223 Accuracy Loads for Heavy Bullets")
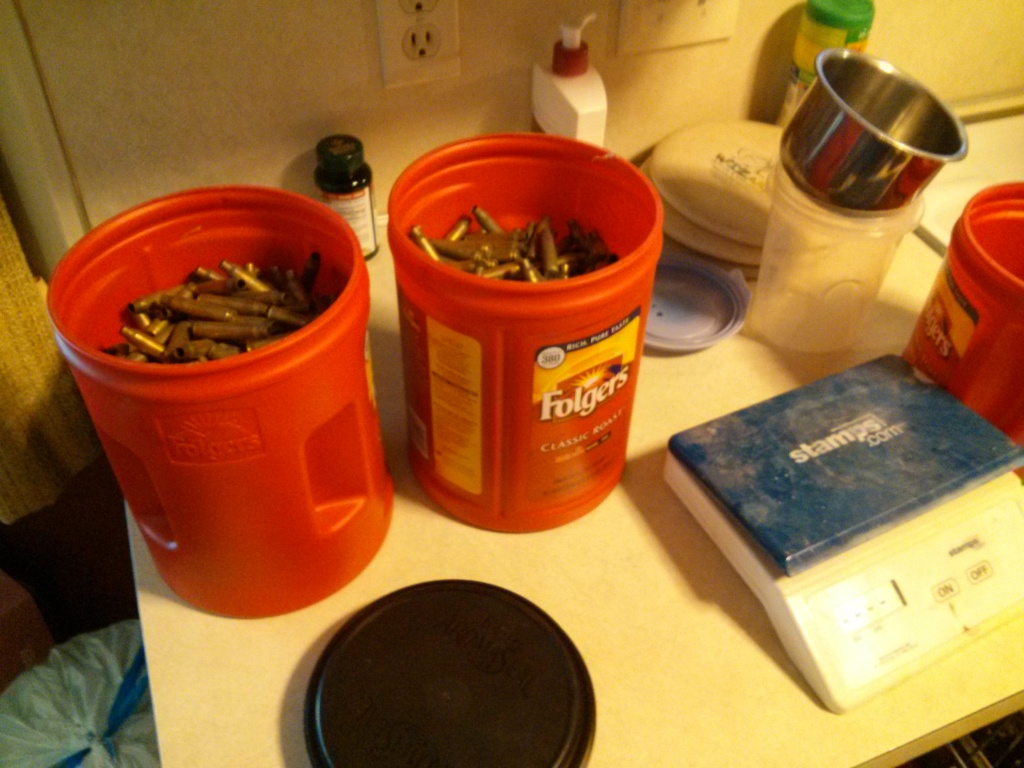
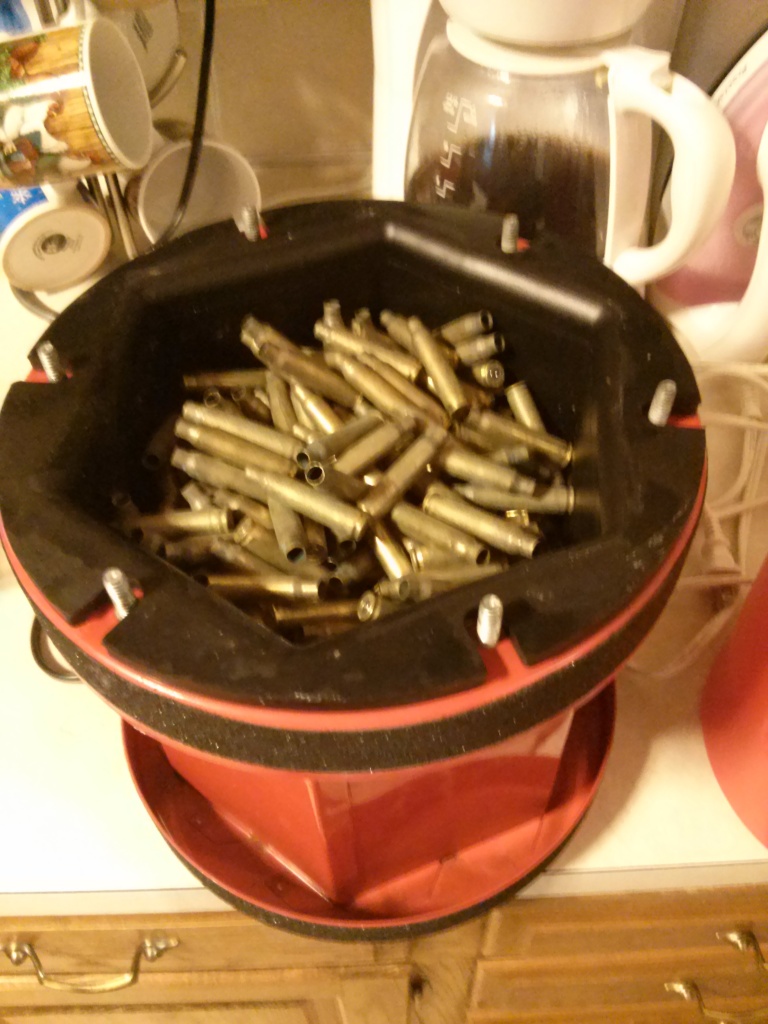
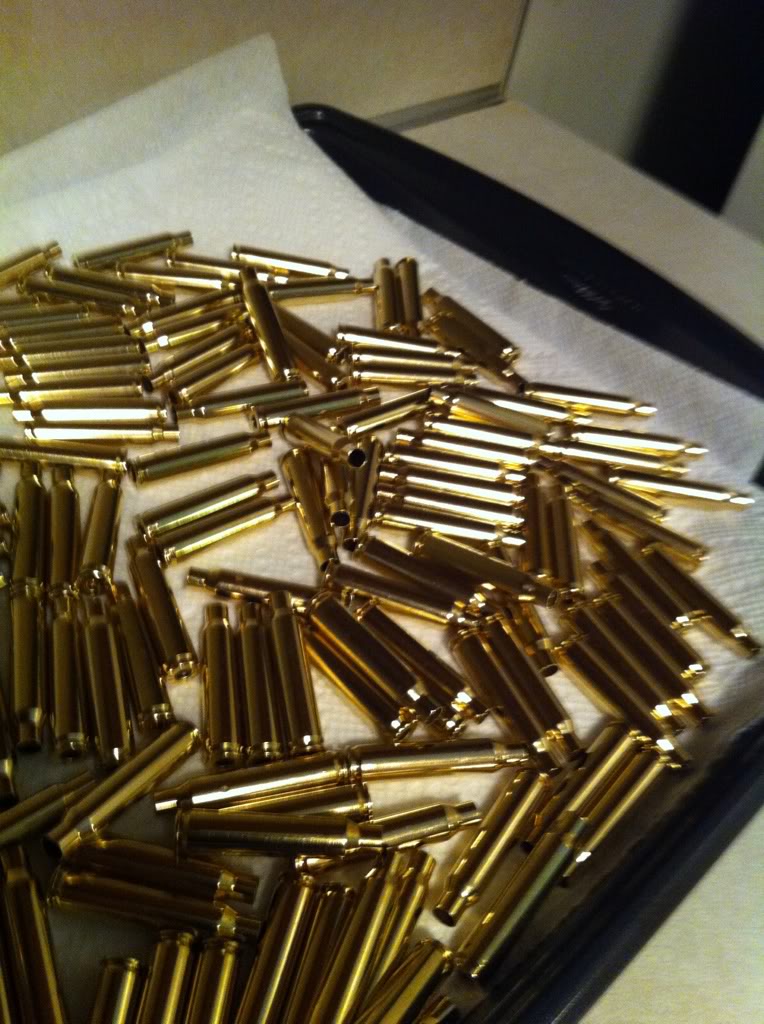
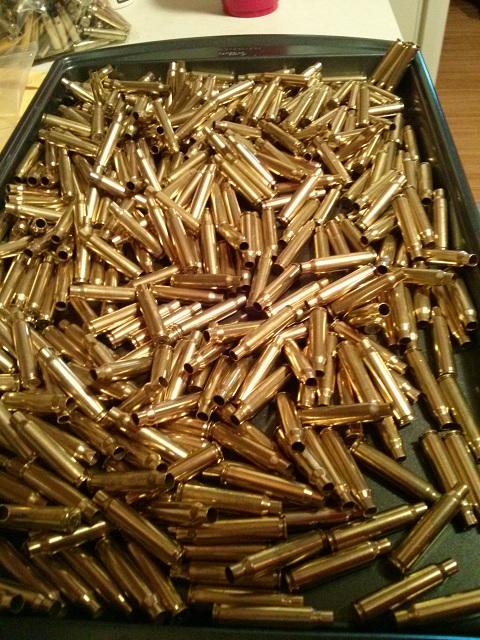
![I think there have been HUGE advances in the discussion of SS media brass cleaning. I know my learning curve was logarithmic. Lots of people have submitted some very good […]](https://theurbanrifleman.com/wp-content/uploads/2013/04/CAM001371-480x300.jpg "My Stainless Steel Media Thumbler Brass Case Cleaning Findings")
![Let me start by saying that I have been moly coating since I started a shooting rifle nearly 20 years ago. I have always moly coated my bullets. I […]](https://theurbanrifleman.com/wp-content/uploads/2013/04/CAM003432-620x300.jpg "Wet Moly Coating Method")

